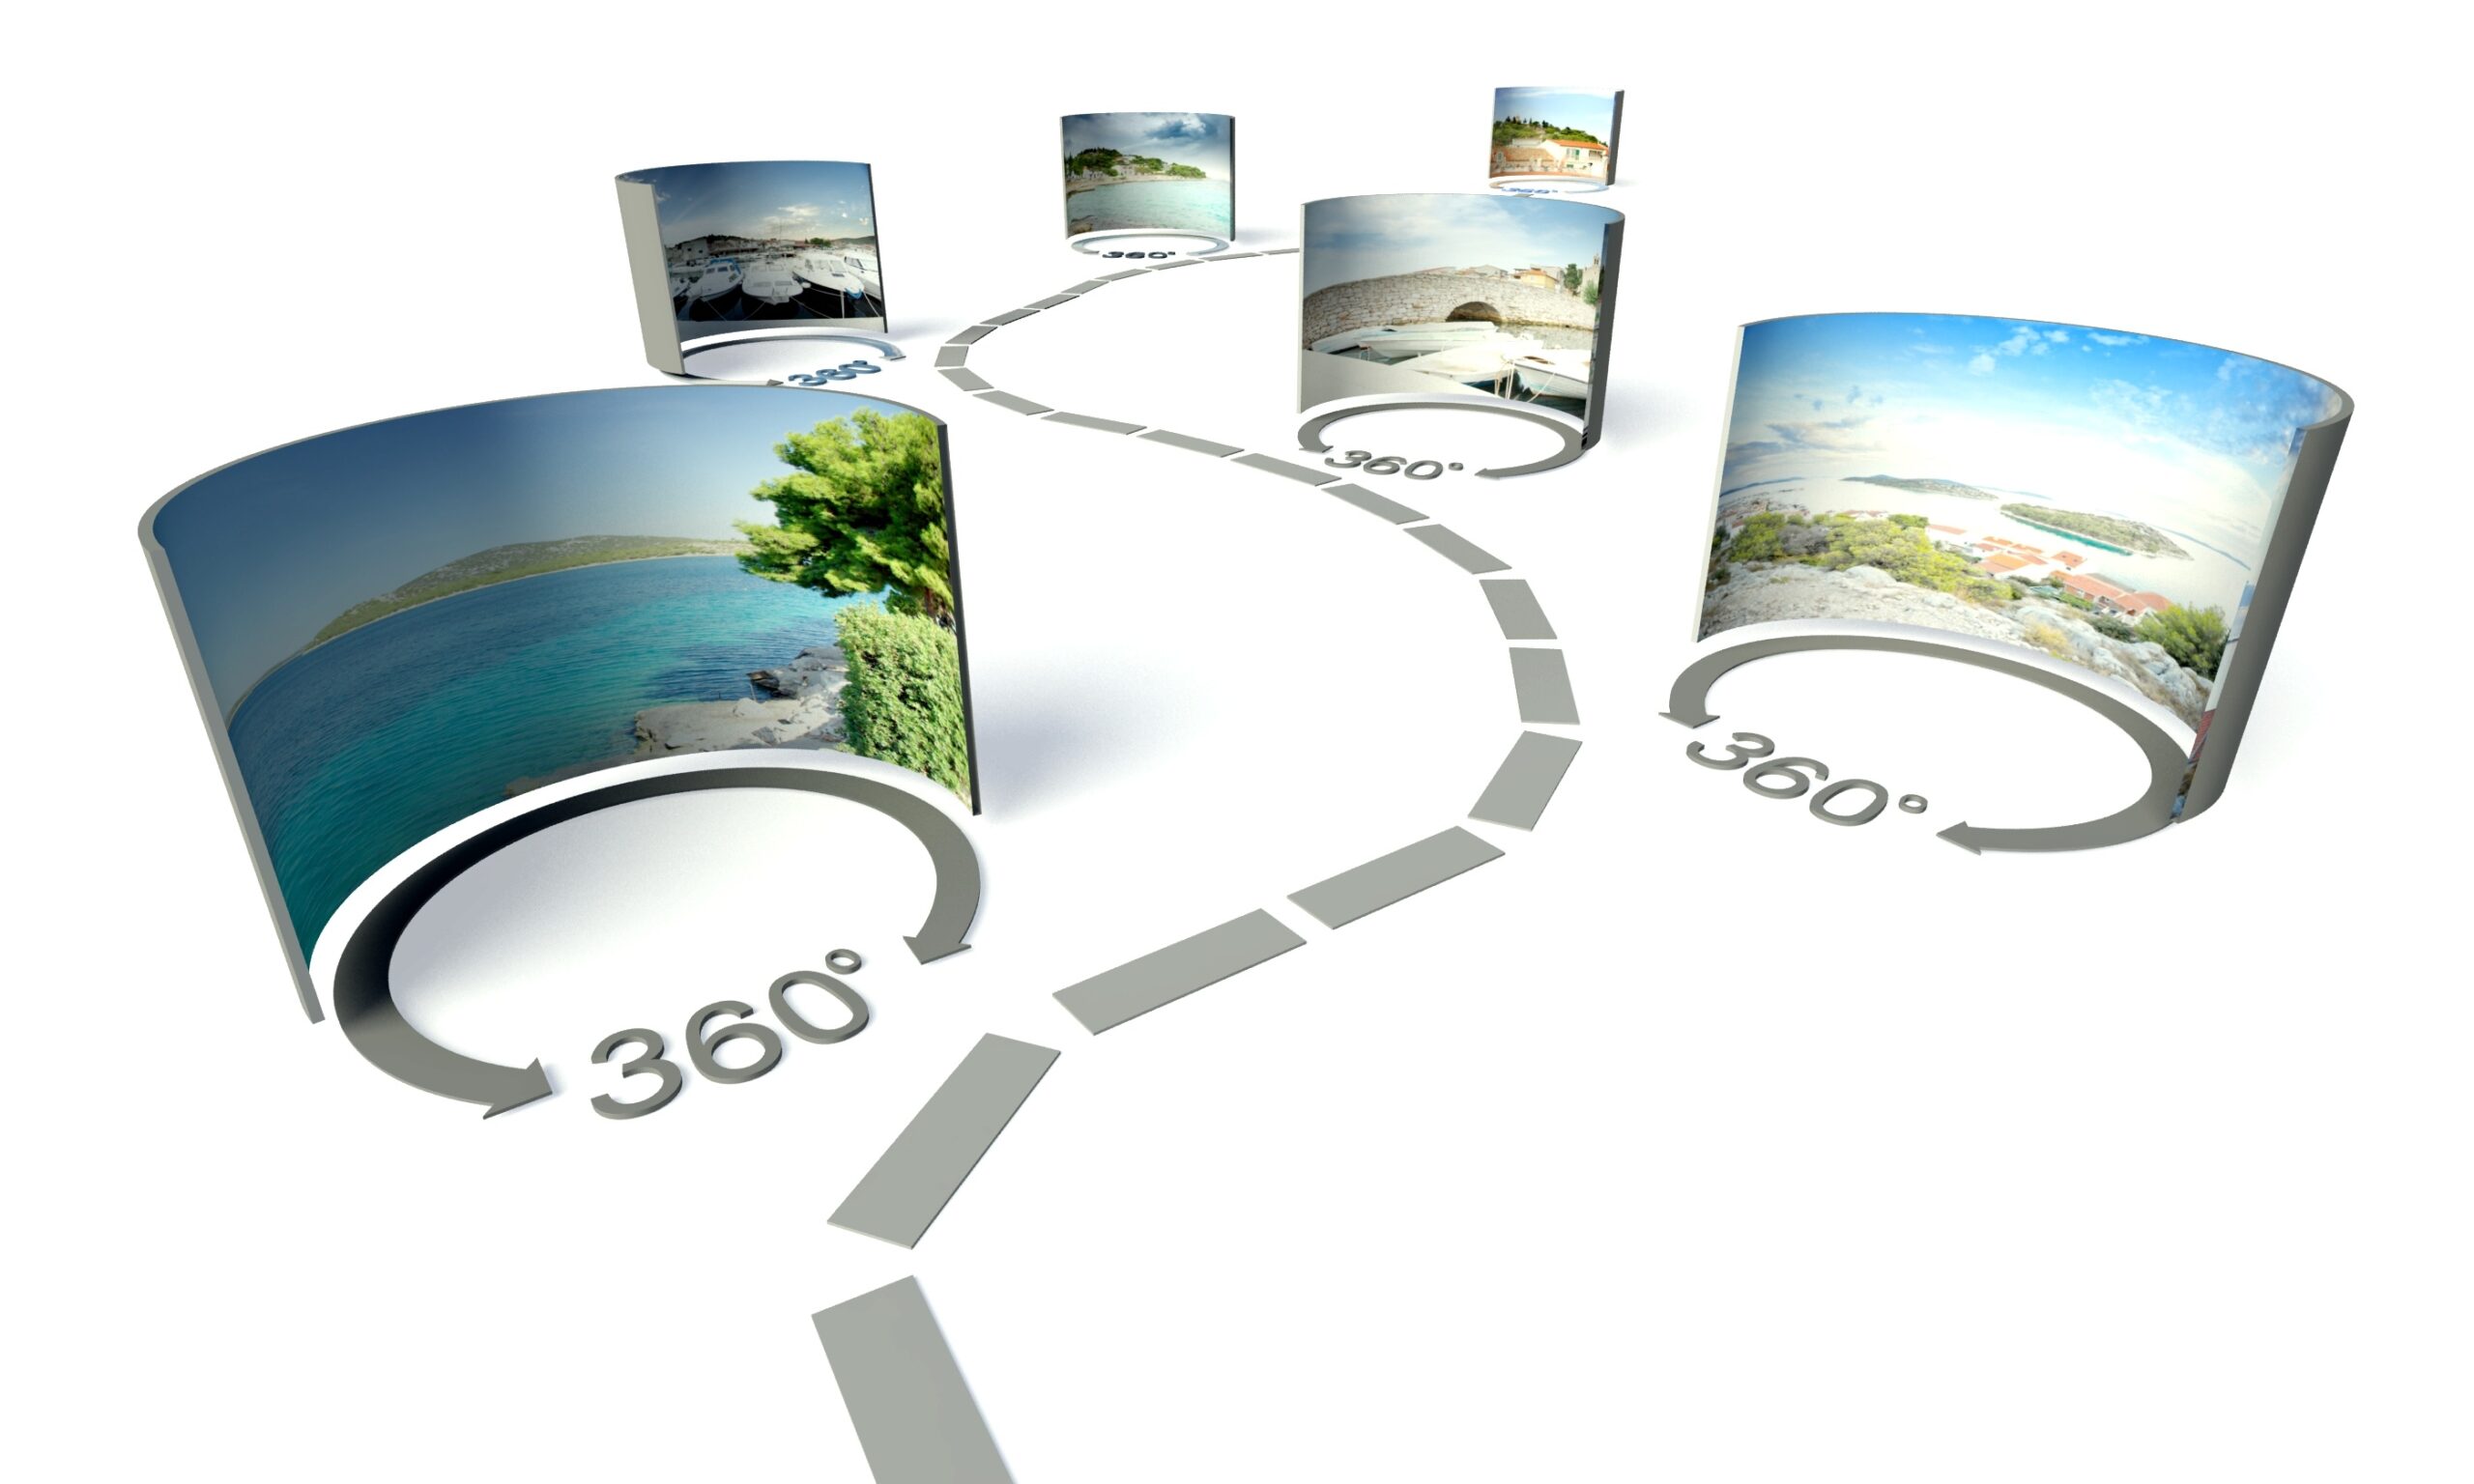
As the pandemic drags on into 2021, limiting in-person visits to local historic and cultural institutions, I’ve been thinking more about the potential for virtual tours to help organizations better connect to their audiences. I’ll admit I wasn’t previously as attentive to the possibilities of virtual tours as I should have been — I thought mostly of their usefulness for real estate. In reality, virtual tours have an amazing potential to serve marketing needs across many industries, and particularly benefit cultural institutions.
So last month, I rented a 360 camera and arranged to work with three organizations — a house-museum, an historic church, and a school — to produce sample tours. Since my usual work involves volumetric VR and mobile AR development using a game engine, this was an interesting departure for me. Camera-based VR is an important tool for XR developers to be familiar with, even if it doesn’t become a major part of their process.
For the many VR developers who make their way into the industry via film, some of what I mention here will seem obvious, but for those of us with software or game-industry background, working with camera-based 360 and VR is a learning curve.
How is Camera-Based VR Different from Volumetric VR?
The primary difference between the formats is that Camera-based VR restricts the viewer’s perspective to that of the camera. Practically, this means that if a viewer is wearing a VR headset, no translation — moving up, down, forward, back, left or right — will change the viewpoint of the scene. If viewers are prepared for a room-scale experience, this limitation can be disorienting, or may even cause nausea.
In many cases, though, viewers of 360 content don’t wear headsets. This is a cause for dismay for many 360 video producers, but it is the reality that many people would rather experience a virtual tour or a 360 YouTube video on their computer or mobile device, even if they have a headset available — in a lot of cases convenience will win out in the tradeoff between greater immersion of a headset and the ease of use of a mobile device.
So creators of camera-based VR need to think carefully about how to craft something compelling given the range of platforms and hardware viewers may use to experience their work. If you expect to distribute on YouTube, for instance, there can be no branching narrative or interactivity, while making use of these features via a custom Unity app may mean that your work has greatly limited reach.
Are 360 and Camera-Based VR ‘Real’ VR?
Some VR elitists claim that panoramic photography and 360 videography (especially if it’s monoscopic) doesn’t meet the definition of virtual reality, and that only volumetric or at least stereo experiences are ‘true’ VR. I don’t find this kind of divisiveness to be useful — volumetric VR and other forms of 360 media all aim to provide immersive experiences that allow viewers to feel that they have been transported to a new space.
It’s true that volumetric VR can feel more immersive in that you can truly look around objects and move through space, but on the other hand 360 photos and video can be photorealistic, which is something that most consumer VR can’t yet achieve.
What’s more important than these definitions, though, is managing expectations. If you’re doing client work, it’s important to be able to describe the end result of a 360-based workflow accurately. If your client has only played Half-Life: Alyx at their friend’s house, you’ll need to provide some good examples of the kinds of work you’ll produce as part of your pitch. One of the most difficult aspects of working in VR is communicating accurately what you’re aiming to produce — having samples of relevant work in the client’s industry and using a similar set of tools and software can go a long way to managing expectations.
What are the Best Use-Cases for Photographic 360?
First, it’s worth thinking about whether your use-case is generally well served by VR generally. Is the experience something that is hard to access or replicate without significant cost, danger, location, or inconvenience in a non-virtual format? Due to Covid19 restrictions, even scenarios that are normally not prime targets for VR experiences now may be good candidates for a virtual tour.
Camera-based 360 is most familiarly used in cases where the location itself is central to the story or to the product being sold. So photographic VR would be an important asset to supporting an experience around a historic site, or accurately showing detailed views of a house, RV, or boat for sale, while it might not be necessary or beneficial for a medical training scenario, where a procedure or technique is the central focus.
Virtual tours are the most common format of photographic or video based VR, and the most familiar application is in marketing real estate. But looking beyond this, there are many applications of virtual tours beyond real estate, as well as other great uses of photorealistic VR.
Given my particular interest in historic preservation and communicating cultural heritage, creating virtual tours is a good fit. Despite the technical challenges I ran into, I expect to continue working with virtual tours. I admit that my resistance to working in this format previously was probably due to some bias against 360 (rather than volumetric) VR, as well as wanting to continue taking advantage of my programming skills, which are not really useful in virtual tour creation.
Hardware — Options and Limitations
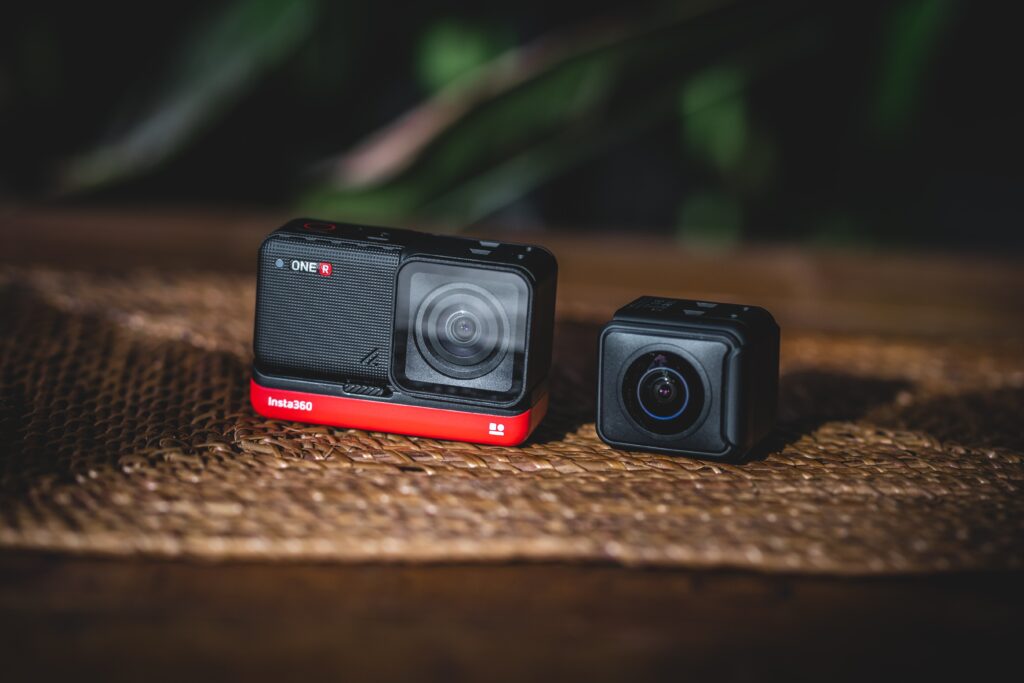
360 cameras come in a wide range from simple, portable point-and-shoots with two fisheye lenses — typically inexpensive and marketed to consumers, to heavy and expensive rigs like the Insta360 Titan, with a hefty price-tag of around 15k US.
More modest cameras are preferable for virtual tours. The prosumer-level cameras used for many virtual tours have a friendly workflow, but they also have some drawbacks — the most significant issue is image quality. Unless you’re willing to spend thousands, both the photo resolution and video resolution of these cameras are fairly low once you consider that you have to stretch the pixels over 360 degrees.
Popular Options
The Ricoh Theta Z1, which is a popular point-and-shoot camera for 360 still photos, has a resolution of 23 Megapixels, or 6720×3360, while it’s video resolution is only 4K.
Insta360 makes a line of consumer cameras — including the Insta360 R, X, and X2 — that are aimed at 360 videography, rather than still photos, with video resolution of 5.7K. This might seem like it’s a lot, but when stretched over 360 degrees, the low resolution is noticeable. This is one of the major complaints about 360 videos, and to address it, you’ll have to spend around $5,000 to get 8K resolution out of the Insta360 Pro or Pro 2. Even with 8K resolution, the image does not seem especially crisp.
If you’re not concerned about video, the best solution to the image quality problem is to move to a standard DSLR camera mounted on a panoramic tripod head. I will definitely look closely at this option in the future, but for my first experiment, I expected to rely pretty heavily on video — much more than I ultimately did.
Choosing the Insta360 Pro2
Because I was initially aiming for video quality, I chose to work with a rented Insta360 Pro 2 for my first tours. However, I would not recommend this camera as a starting point for new 360 creators, especially those working on virtual tours or any experience that focuses mainly on 360 panoramas, rather than cinematic applications. For cinematic VR or stock 360 video footage, the Pro 2 is a good choice, but for my main goal of virtual tour creation it is neither a good enough photographic camera nor is it convenient enough to use for it to be a top choice for a virtual tour.
The other feature that guided me towards the Insta360 Pro 2 was the stereo 3D capture — both for photos and video. After capturing images and video in stereo, however, I found that the workflow for building experiences with them was substantially more complicated and much slower, so I used monoscopically stitched images in the final pieces.
Stereo 3D photography and videography have a lot of potential, however, and provide a much better experience if your audience will be experiencing your work primarily in a headset. For each of the tours I am building, the end result will most likely be viewed on a desktop or tablet, so the simpler monoscopic workflow was sufficient. I intend to go back and try to refine the 3D workflow after I deliver the initial batch of tours.
Hands-on with a 360 Camera
If you are a confident photographer or videographer already, getting to know a 360 camera may feel like a simple step, but otherwise, there is a fair amount of camera terminology that you’ll have to familiarize yourself with before you can feel comfortable shooting 360. Despite a background in filmmaking and a grad-school course in photography, it took me a couple of days before I felt that I would be able to get the kinds of results I intended from the Pro 2. So even if you’re generally experienced around a variety of cameras, give yourself a couple of days of hands-on practice with the 360 camera you’ll be using before you go out on any jobs. Honestly, I would have felt better on my first shoot day if I had allowed myself even more than the two days I had, so I’d consider that a minimum.
Getting Familiar with the Insta360 Pro 2
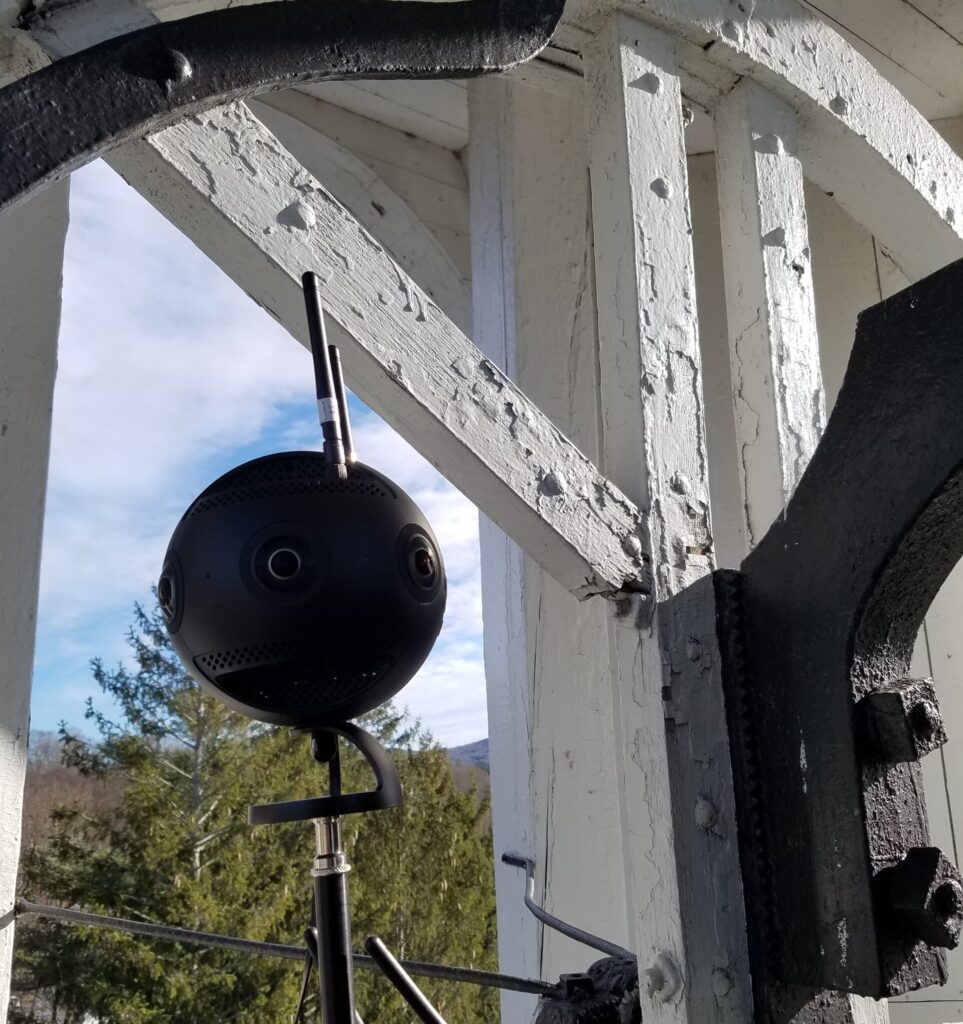
The Pro 2 is fairly heavy and a bit cumbersome with all the pieces that come with it. The camera includes a ‘Farsight’ system which you can hook up to your phone or tablet and can use to communicate with the camera from another room or from another remote location so that you are not in frame. Using your mobile device, you see a preview of the image that the camera is capturing and can change settings and start and stop recording.
The Farsight system successfully enabled remote operation, but it is also more awkward than I expected. It consists of two units, which connect via cords to the camera on one hand and the phone or tablet on the other. On the camera side, you can clamp the receiver to the tripod, though it’s still a challenge to properly secure the cord so that it stays out of the shot.
On the phone/tablet side, the transmitter had a spring mechanism which supposedly clamps around your mobile device. But my iPad was too large for the transmitter to stretch around, so I ended up having to juggle both the iPad and the attached transmitter while shooting.
Technical Troubles
More seriously, I ran into a lot of trouble with saving 360 photographs (video saved correctly). The Pro 2 uses 6 high-speed microSD cards for video storage, plus a seventh SD card which stores metadata as well as photos. The camera I rented had ongoing trouble accessing the SD card, which meant that a large proportion (⅓ to ½) of all photos I took had significant artifacts or were otherwise corrupted. When card reading and writing failed, the camera was unresponsive as it struggled with the data transfer problem, meaning that it might ‘hang’ for 10 minutes or longer as it failed to save an image.
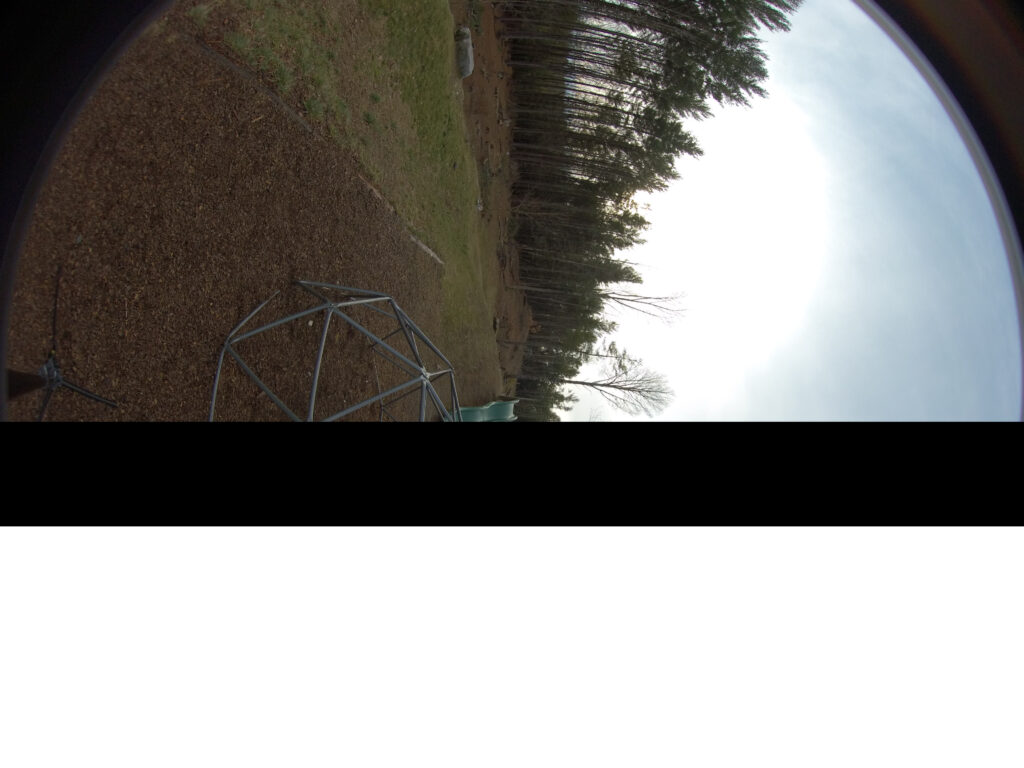
It’s hard for me to evaluate how much of my difficulty with the Pro 2 was due to the specific camera I rented (or the storage media), and how much would be common to any camera of this model. The lead technician at the rental company I used mentioned that both the Insta360 Pro 2 and Titan are more susceptible to these kinds of issues due to the large number of SD and microSD cards in use — seven — and how problems in any one card can cause problems to the overall image.
You probably won’t be using the Insta360 Pro 2, so my specific concerns with the camera won’t be relevant, but it’s worth noting that 360 cameras are not as refined as standard format digital cameras, and may be more prone to design or hardware issues that make your shoot more cumbersome or prone to failure. Ideally, you can schedule time to evaluate your capture results on set, so that you don’t end up in the editing room and discover that you’ve missed shots you thought you had.
Editing 360 Images
Post-production of 360 assets uses similar tools and skills as standard format images and video, but there are a few extra steps and challenges.
Stitching
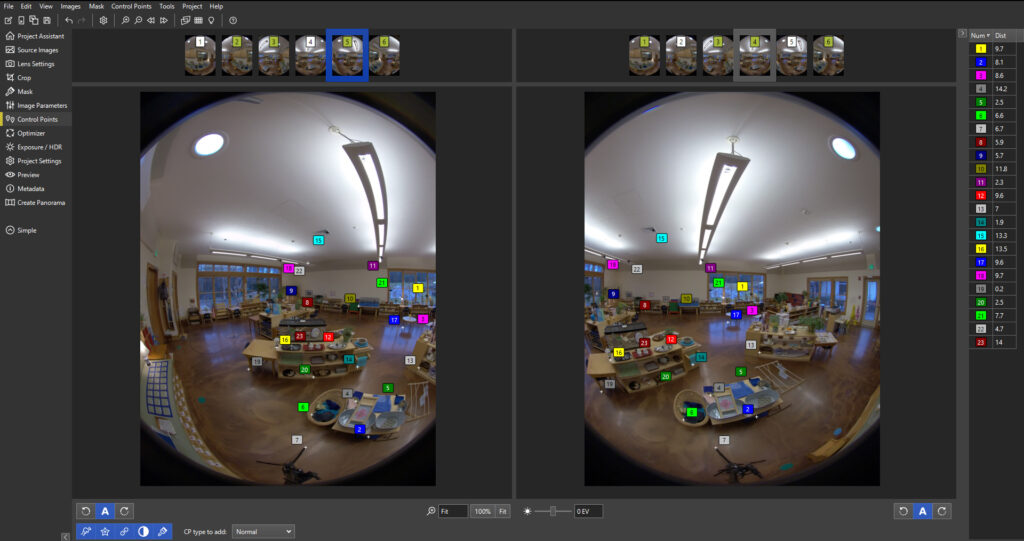
Because the image captured is from multiple sources, the first post-production step is to ‘stitch’ the image recorded from each lens together into a larger 360 panorama. Many 360 cameras ship with their own stitching software, or will even stitch in-camera. However, if you’re using a DSLR setup or need more control over the stitching process, there are various standalone stitching software options including the paid PTGui and the open-source Hugin.
For most of my images, the default Insta360 stitching software provided fast and accurate stitching, and delivered equirectangular DNG Raw photos that I later edited in Photoshop or Lightroom.
In two instances, however, where the camera was positioned lower, I discovered significant stitching errors. In these cases, I tried a number of software options, including both Hugin and PTGui, as well as the stitching software that came with the virtual tour software I purchased, 3DVista Stitcher. In all cases, these two images produced stitching errors, though I suspect that I might have had better luck correcting them in Hugin or PTGui if I’d had deeper knowledge of that software.
Looking on Insta360’s forum, I noticed that other users have reported similar stitching errors with cameras positioned closer to the ground. Although stitching problems are common when objects are placed very close to a camera, I can’t imagine why camera positioning would affect stitch problems in unrelated parts of the image (above the horizon, in this case) in the middle distance.
After getting less-than-satisfactory results with each of the four stitching software options, I ended up using two images with different types of stitching errors and manually compositing them in Photoshop.
Editing
Beyond the stitching stage, which ideally will be mostly automatic and produce seamless images, you’ll want to do any standard color correction, sharpening or noise reduction.
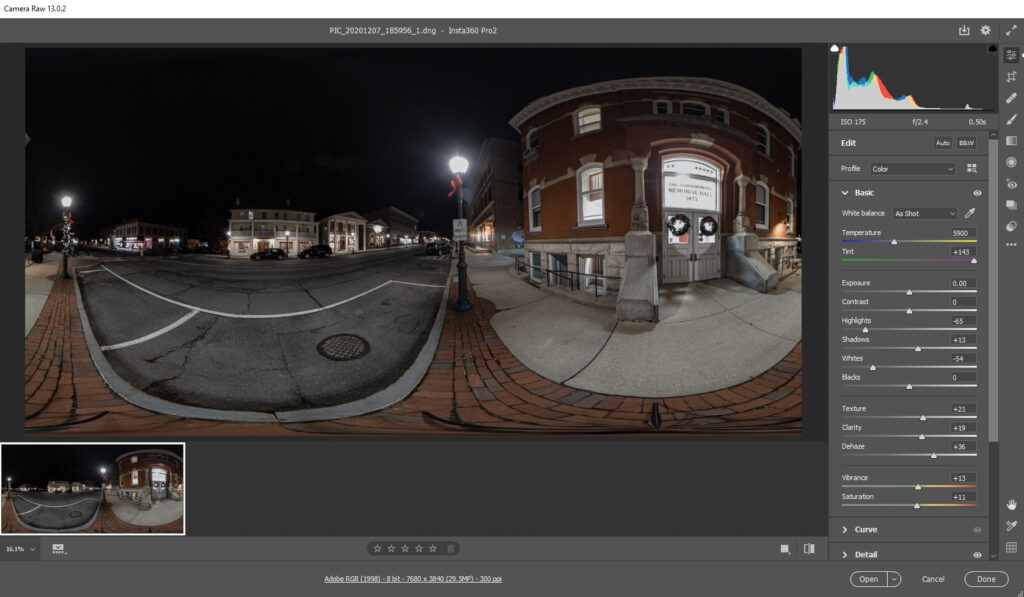
Unique to 360 formats, you’ll also need to remove the tripod from the bottom of the image (the nadir), and address any stitching artifacts at the top of the image (the zenith). To do this, you’ll want to look at your image in 3D, rather than in the equirectangular projection. I primarily used Photoshop, where you can view the image in 3D by selecting the relevant layer and then choosing 3D > Spherical Panorama > New Panorama from Selected Layer(s).
With the converted projection, you can now ‘look around’ your image using the Move tool, which now bears a slightly different icon. You can use tools like the spot healing brush or clone stamp to fix up the zenith and nadir. Adobe provides some starter information on using the 3D tools in Photoshop here: https://helpx.adobe.com/in/photoshop/using/create-panoramic-images-photomerge.html#Edit_panoramas.
If you can, try to position your camera to make the tripod removal in post-production straightforward — you don’t want to spend hours in Photoshop rebuilding a boardwalk or complicated mosaic with the clone stamp tool if it’s not strictly necessary.
Once you’re happy with the way your photo looks, you can export it by selecting 3D > Spherical Panorama > Export Panorama. The image saves as a JPEG, which is a reasonable format for tour software and delivery over the web.
360 Video Postproduction
Stitching 360 video used to be quite a challenge, but the experience is a lot more streamlined with improvements to the proprietary stitching software that most manufacturers include to support their cameras. Prior to this, the best option was expensive standalone stitching software such as the now-defunct Kolor Autopano. Additionally, most cameras now have gimbal systems or software techniques for horizon leveling, taking out several of the more tedious steps previously required before the edit even began.
After stitching, you can import footage into your editing suite. Adobe Premiere is the most common choice for 360 creators since it was the first major editing suite to embrace 360. Today, there are more options, including Final Cut Pro, if that is your preference. However, Premiere also benefits from tight integration with AfterEffects, which is an essential tool if you are trying to edit stereographic (3D) video, or do more complicated composites.
Dealing with Tripod Removal and Other Fixes
One aspect of 360 video that is more complicated than 360 photo editing is tripod removal, though with a stationary camera (the most common situation), you can deal with the problem by exporting a still frame of video from Premiere and modifying it in Photoshop. Paste the corrected floor/ground image back into Premiere and crop that image so that only the tripod area is shown. Using this strategy, the patched area won’t interfere with the movement in the video as long as the action in the shot is far enough away from the tripod.
When more complicated correction is needed, for instance removing the tripod from a video with a moving camera, After Effects or a 3rd party tool such as Boris FX is a good choice.
For most virtual tours, video is not a good choice due to the large file sizes, which quickly make delivery over all but the fastest networks infeasible. For this reason, 360 video is more applicable for narrative pieces or app-based experiences. For my recent projects, I quickly concluded that 360 video was likely to bog down my tours and have a negative impact on user experience. Opportunities to use 360 video in a wider range of contexts will increase as infrastructure improves and 5G availability expands. However, for now, I worked to find ways to substitute photographs in many of the cases I initially intended to use video.
Assembling a Tour
Coming from engine-based XR creation, I initially expected to use something like Unity with a plugin to facilitate VR consumption. Ideally, I hoped to find something that would build to both headsets and to WebGL, for web delivery.
As I thought about it further, I realized that the web was really the primary platform for virtual tours, and the number of people who would consume the content via a headset was likely to be a small minority. Thus, it made little sense to think about an engine-based approach, especially since there were some limitations in Unity on the size of textures. So, without some workarounds, the output would likely be lackluster, with no obvious benefit to Unity aside from personal familiarity with the tool.
Virtual Tour Software Options
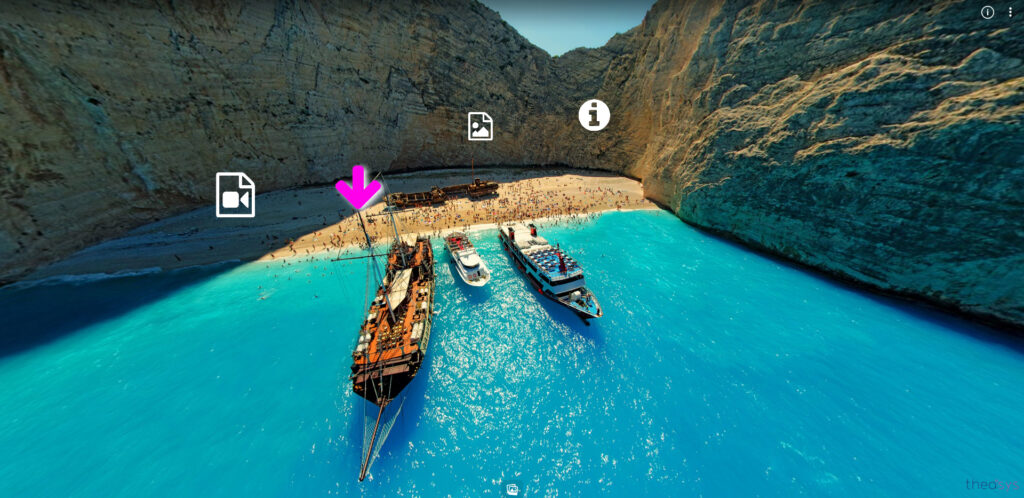
Once I stopped thinking inside the box, I realized there are a ton of options out there for virtual tours — which makes sense since this form of VR is so prevalent. The field is so crowded for virtual tour software providers that even if you have no budget, you can still find a number of powerful options to build your tour. Options such as Theasys (above) impressed me with the amount they could offer for low or no money.
3DVista’s Virtual Tour Pro
Ultimately, though, I ended up purchasing 3DVista Virtual Tour Pro, which is one of the more expensive options, with a list price of $500 or €500, depending on your region. 3DVista is not just virtual tour software, though — it provides capability for creating LMS-integrated VR training applications, and has support for stereoscopic 3D photos and videos, as well as a number of ways to integrate video and animations in the experience. I also liked the ability to create an executable with the software, in addition to a web application.
I’ve heard about some more creative uses of VTPro, with some users building visual novels and other narrative works using the software. Once I’ve wrapped and shipped my virtual tours, this is something I’d like to explore myself.
Despite it’s range of features, 3DVista’s VTPro is quite easy to use, with a straightforward UI. As someone who is generally comfortable with a range of desktop applications such as Adobe products and game engines like Unity, I found that I was able to figure out most of what I needed to know just by exploring the software. By the end of my first tour, I had a pretty good handle on how to set things up.
Nevertheless, some aspects of the software are limiting. My biggest frustration is with the lack of control provided over the UI when the experience opens in VR-mode. This is especially disappointing considering that creating successful VR-mode tours was one of my primary motivations, and I hope that 3DVista dedicates some attention to supporting richer UI options for headset users.
Distributing Virtual Tours
Aside from games, which have obvious distribution options such as Steam and the Oculus store, 360 content has several avenues for distribution, but no clear best path. Publishing virtual tours or other 360 content to game outlets means that the experience is exposed to users who are less likely to be interested, while missing out on the most likely audience.
Over the next few years, increased WebXR adoption will make the web the best place to publish 360, though YouTube is also a good choice for linear narratives. Either of these options are likely to expose your work to a larger, more interested audience than relying on Steam.
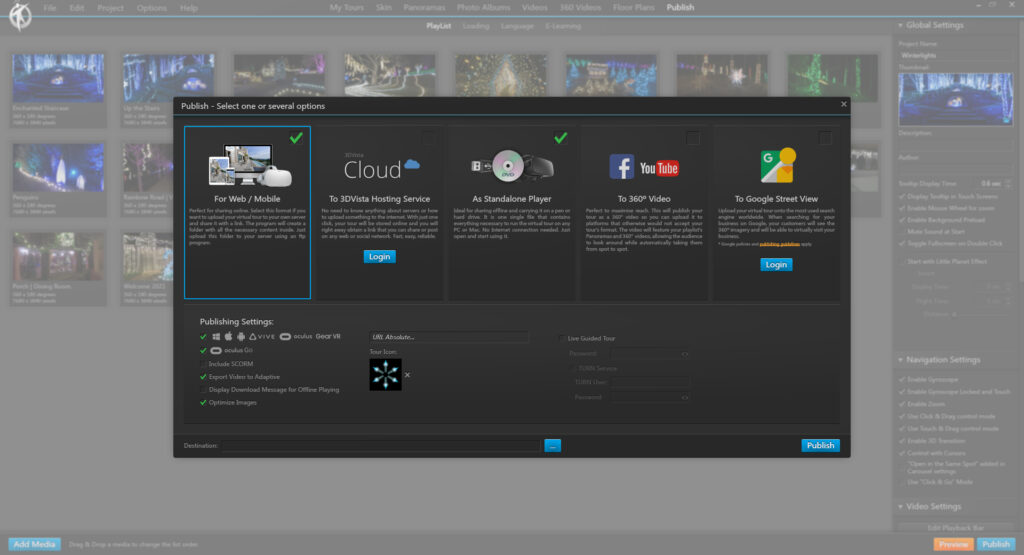
Most virtual tour software focuses primarily on web-based distribution. 3DVista’s Virtual Tour Pro is especially flexible in offering a range of publication options, including both self-hosted and managed hosting for the web, as well as standalone PC and Mac builds, YouTube and Google Street View distribution. With a few clicks, I was able to create builds of my tours for several platforms, though only ultimately published to the web.
Who Should Make Virtual Tours?
Hopefully, you are thinking about what kinds of tours you might be able to make in your area, and wondering if virtual tours might be something to add to your repertoire. Here are some things that may help you decide whether to make the leap.
Costs
Getting started with virtual tours can be somewhat expensive, due to the requirement for specialized camera equipment, with starter-level consumer cameras available for around $500, and more sophisticated cameras rentable starting at around $300. Higher-end point-and-shoot cameras such as the Ricoh Theta Z1 go for around $1000, while DSLR setups start around the same price-point assuming you already have a camera body.
Beyond this, there are a lot of ‘hidden’ costs, since 360 cameras require high-quality microSD cards with fast write speeds, as well as a quality monopod. If you don’t already have access to Creative Cloud applications, you may need to subscribe, or purchase alternatives such as Affinity Photo.
On the other hand, if you’re looking to make money from VR, virtual tours can be a good way to find consistent well-paying business. For those living in countries with higher costs of living, creating virtual tours is a service that is resistant to outsourcing, so you may find that virtual tours can carry a price-point with a higher floor.
Skill-set
The skill-set for creating photographic virtual tours does not overlap very significantly with other forms of volumetric VR creation, nor does it usually have as much to do with narrative 360 video as you might think. Basically, virtual tour success relies most on your skills as a photographer, which definitely represents an identity shift for me. If you’ve spent years focused on becoming a better programmer, as I have, delving into virtual tours may not feel as though you are playing to your strengths. Though I have been able to draw from my understanding of VR UX design to improve my work, most virtual tours are not consumed on headsets, which minimizes the impact of this strength.
Marketing
Finally, your success building virtual tours relies on your ability to reach out and sell the idea to companies and organizations you’d like to work with — organizations that likely have never considered the idea of a virtual tour before. This means you’re working with a longer and more complicated sales process, so if you’re queasy about sales and reaching out to people, virtual tours may be challenging from the business perspective.
Despite these issues, I have a lot of optimism about how virtual tours can help businesses and organizations reach out to new customers and audiences, especially in light of today’s world of lockdowns and self-isolating, which may limit in-person interactions. The promise of the technology goes a long way to overcoming some of the difficulties with working in this new format.

